ディスコードで、メッセージに添付された画像orメッセージに含まれるリンク先の画像をBOTを動かしているPCの任意のディレクトリにダウンロードする方法をまとめました。
メッセージに添付orリンク先の画像をダウンロードできれば、アップスケールするBOTやOCR(文字を画像から抽出)機能をもつBOTなどの作成が可能となります。
完成したコード
後半に解説も置いておきます。
完成品(コピペ用)
こちらをfunc.pyなどと名付けて保存してください。
"""画像をダウンロードする。PNG画像は自動的にJPG形式に変換して保存する。"""
import urllib.request
import re
import imghdr
from PIL import Image
import requests

def url_image_download(url, save_pass):
    """URL先の画像をダウンロード。"""
    response = requests.get(url, timeout=(3.0, 7.5))
    image = response.content
    with open(save_pass, "wb") as download_img:
        return download_img.write(image)

def tenpu_image_download(url, save_pass):
    """添付画像をダウンロード。"""
    opener = urllib.request.build_opener()
    opener.addheaders = [("User-agent", "Mozilla/5.0")]
    urllib.request.install_opener(opener)
    urllib.request.urlretrieve(url, save_pass)
    return

def download_image_class(message, save_pass):
    """
    messageにhttpという文言が含まれていれば、httpに続く文字列をURLと解釈し、画像をダウンロード
    でなければ、messageに添付されたファイルをダウンロードする
    ダウンロード位置はsave_passで絶対パスを指定する
    """
    words = ["http"]
    for word in words:
        if word in message.content:
            url = message.content
            url = re.search(r"http.*", url, flags=re.DOTALL)
            url = url.group(0)  # メッセージからhttpを含む、http以下の文字を取り出してURLにしている
            url_image_download(url, save_pass)
        else:
            url = message.attachments[0].url
            tenpu_image_download(url, save_pass)
        # 実はpngのをjpgに変換して上書き保存
        imagetype = imghdr.what(save_pass)
        if imagetype == "png":
            image_convert = Image.open(save_pass)
            image_convert = image_convert.convert("RGB")
            image_convert.save(save_pass)
実際の使い方
ディスコードにて様々な応答を行ったりするメインのpython ファイルと同じディレクトリに配置すると使えます。

メインのPythonファイルに、まず「from func import download_image_class」と書いておきます。
その後、「save_pass=”C:\\discode_bot\\test.jpg”」などと保存場所を指定します。
最後に、ダウンロード処理をさせたい部分に「download_image_class(message, save_pass)」と記述し、完了!
一例は以下の通り。
上記の.pyと同じディレクトリに、以下のコードを書いた「funcs.py」を配置します。
"""メインのPythonファイル"""
import datetime
from func import download_image_class
import discord

# 接続に必要なオブジェクトを生成
client = discord.Client(intents=discord.Intents.all())

@client.event  # 発言時に実行されるイベントハンドラを定義
async def on_message(message):
    """実際に応答する箇所"""
    words = ["!example"]
    for word in words:
        if word in message.content:
            date = datetime.datetime.now()
            save_pass = (
                "C:\\discode_bot\\test\\" + date.strftime("%Y%m%d%H%M%S") + ".jpg"
            )
            download_image_class(message, save_pass)

# 処理ここまで
# 起動とDiscordサーバーへの接続
client.run("ここはご自身のトークン記入してください!")
取りあえず日時をファイル名とすることで、良い感じに被らず保存できます。
動かしてみる
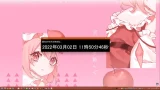
「!example 画像のURL」と送信してみると、その画像がダウンロードできているでしょう。
ゆるゆりは素晴らしいアニメのため例に用いました。(布教)

ローカルストレージに保存した画像を添付してみても、同様に。

画像の保存さえできれば、アップスケールBOTやOCR(画像の文字読み取り)機能BOTなども構築可能です。
Discordでこの先色々な機能を付けたBOTを動かす際、一々ダウンロード処理を書かずとも、これで画像をダウンロードすることができます。
何度も用いる機能を別のファイルで一気に定義しておくと、記述も修正も楽ちんです。

以下解説をざっくりと。
funs.pyの解説
まず、モジュールをインポート。
人によっては、
pip install Pillow
pip install requests
が必要かもしれません。
"""画像をダウンロードする。PNG画像は自動的にJPG形式に変換して保存する。"""
import urllib.request
import re
import imghdr
from PIL import Image
import requests続いて、リンク先画像をダウンロードする機能と、添付画像をダウンロードする機能を定義します。
片方だけ使うようなBOTも作るかもしれないので、一応分けて定義。
def url_image_download(url, save_pass):
    """URL先の画像をダウンロード。"""
    response = requests.get(url, timeout=(3.0, 7.5))
    image = response.content
    with open(save_pass, "wb") as download_img:
        return download_img.write(image)

def tenpu_image_download(url, save_pass):
    """添付画像をダウンロード。"""
    opener = urllib.request.build_opener()
    opener.addheaders = [("User-agent", "Mozilla/5.0")]
    urllib.request.install_opener(opener)
    urllib.request.urlretrieve(url, save_pass)
return最後に、リンクからor添付からという2つのダウンロード方式のどちらを使ってダウンロードするかを判断して、ダウンロードする機能を定義します。
リンク先がPNGでもJPG画像の方が色々扱いやすいので、保存した画像がもしPNGならJPG形式に変換して保存する機能を付けてます。
def download_image_class(message, save_pass):
    """
    messageにhttpという文言が含まれていれば、httpに続く文字列をURLと解釈し、画像をダウンロード
    でなければ、messageに添付されたファイルをダウンロードする
    ダウンロード位置はsave_passで絶対パスを指定する
    """
    words = ["http"]
    for word in words:
        if word in message.content:
            url = message.content
            url = re.search(r"http.*", url, flags=re.DOTALL)
            url = url.group(0)  # メッセージからhttpを含む、http以下の文字を取り出してURLにしている
            url_image_download(url, save_pass)
        else:
            url = message.attachments[0].url
            tenpu_image_download(url, save_pass)
        # 実はpngの.jppをちゃんとjpg形式に変換して上書き保存
        imagetype = imghdr.what(save_pass)
        if imagetype == "png":
            image_convert = Image.open(save_pass)
            image_convert = image_convert.convert("RGB")
            image_convert.save(save_pass)
たったこれだけで画像のダウンロードが可能です。
あとはこれらの機能を用いるメインのbot.pyを書いていきます。
bot.pyの解説
サクッとインポート。
2行目のfrom func import download_image_classは、前述した機能を読み込むだめのものです。
bot.pyとfunc.pyは同じフォルダ内に配置しましょう。

"""メインのPythonファイル"""
import datetime
from func import download_image_class
import discord
続いて、実際の処理を書きます。
ここでは、「!example」という文言が含まれていれば、そのメッセージに添付or記述されたURL先の画像をダウンロードするBOTを作っています。
ちなみに、
if message.content == “!example”:
では正常に動きません。
もしメッセージにURLが含まれていた場合、反応してくれませんので。
# 接続に必要なオブジェクトを生成
client = discord.Client(intents=discord.Intents.all())

@client.event  # 発言時に実行されるイベントハンドラを定義
async def on_message(message):
    """実際に応答する箇所"""
    words = ["!example"]
    for word in words:
        if word in message.content:
            date = datetime.datetime.now()
            save_pass = (
                "C:\\discode_bot\\test\\" + date.strftime("%Y%m%d%H%M%S") + ".jpg"
            )
            download_image_class(message, save_pass)

# 処理ここまで
# 起動とDiscordサーバーへの接続
client.run("ここはご自身のトークン記入してください!")
以上でBOT完成です。
お疲れさまでした。
Pythonを快適に書くなら
VSCodeを使い
以下の拡張機能を入れるといいですよ!!(布教)
全て私が連日お世話になってる拡張機能です。
Pythonを用いた制作物についてもごらん下さい。